
How I'm Transforming My Living Room To Match My Vibe Part 4

The wallpaper has been installed in the living room you guys and I’m totally in love with it!
It’s amazing how things worked out because the original wallpaper that I selected for the room was scratched since Photowall reached out to sponsor the wallpaper for the space. I’m so grateful they did because this wallpaper is just P👏🏽E👏🏽R👏🏽F👏🏽E👏🏽C👏🏽T👏🏽I👏🏽O👏🏽N👏🏽 and just really embodies who we are as a family.
I chose this design because of how grounding it makes me feel and that’s because the design truly reminds me of the rings inside of a tree trunk. This is my way of bringing in grounding pieces into the design that aren’t so literal because literal is just quite boring if you ask me.
The room feels so much brighter and just feels so us so I cannot wait until the rest of the design is implemented. It only gets better from here on out!
If this is your first time reading about my living room makeover, check out part 1 , part 2 and part 3 here so you can catch up. I wanted to bring you along this journey so that you can get a sense of how the decorating process unfolds and ultimately see how a design plan is birthed.
What a difference this one change has made in the space! Like just WOW!
So let me stop talking and get to the sharing of the wallpaper install with you…drumroll….

Photowall Wallpaper Nami - Superlight
This was my first attempt at ever installing a traditional wallpaper aka wallpaper that requires paste for installation.
I’m not going to lie, initially I was intimidated, but I just decided to go for it. It REALLY helped that the instructions Photowall provided were clear and concise to follow plus the paste was included in a powder form and all I needed to do was mix it with water (easy!). They also number each panel for you so that you aren’t left trying to piece together the pattern on your own, which is a huge timesaver! As long as you line up that first panel in a straight line, the rest is easy since all you’re left to do is follow the number sequence. If you rush the installation of that first sheet and hang it crooked, well the rest of the install is going to be crooked and that my friend ain’t cute. So as long as you follow the instructions and practice patience, you’ll be good plus they provide an installation video for those that do better with visuals.

Photowall Wallpaper Nami - Superlight
If you saw my last post, you will be able to see the difference between the real life look of the wallpaper versus the 3D view I shared with you guys.
If you’ve been here since part 1 of this makeover, you’ll notice that I still haven’t installed the damn doors for this media cabinet. It’s coming though…I promise and soon.
Another soon to be completed project is installing this wallpaper on the opposite wall where the sectional sits, which I planned to do last week, but was too sore to do plus I ran out of putty to plaster (to fill the the holes on the wall) and haven’t gotten around to buying more. Then I put if off for this week, but with the recent shift in routine with back to school for the kids, your girl needs a time out so that’s being postponed for the following week (fingers crossed). On top of that, I realized that I should’ve added more than the 4 inches of excess wallpaper to my measurements since I was short about 6 inches of wallpaper to complete the second wall, but my friends at Photowall were awesome and provided me with another roll. So my tip is order up about 10 inches to be on the safe side.
So if you’re looking to add wallpaper to your next design project, I highly recommend using Photowall and I’m not just saying that because of their sponsorship because I only share products with you that I use myself or have been recommended to me by those I trust in the industry plus it doesn’t hurt that their product really is fantastic and easy to use. Oh and I almost forgot to add that they also sell canvas prints and posters, which I did get as well. I haven’t hung the piece yet since I’m still waiting to buy the frame, but here is the one I chose for our space.
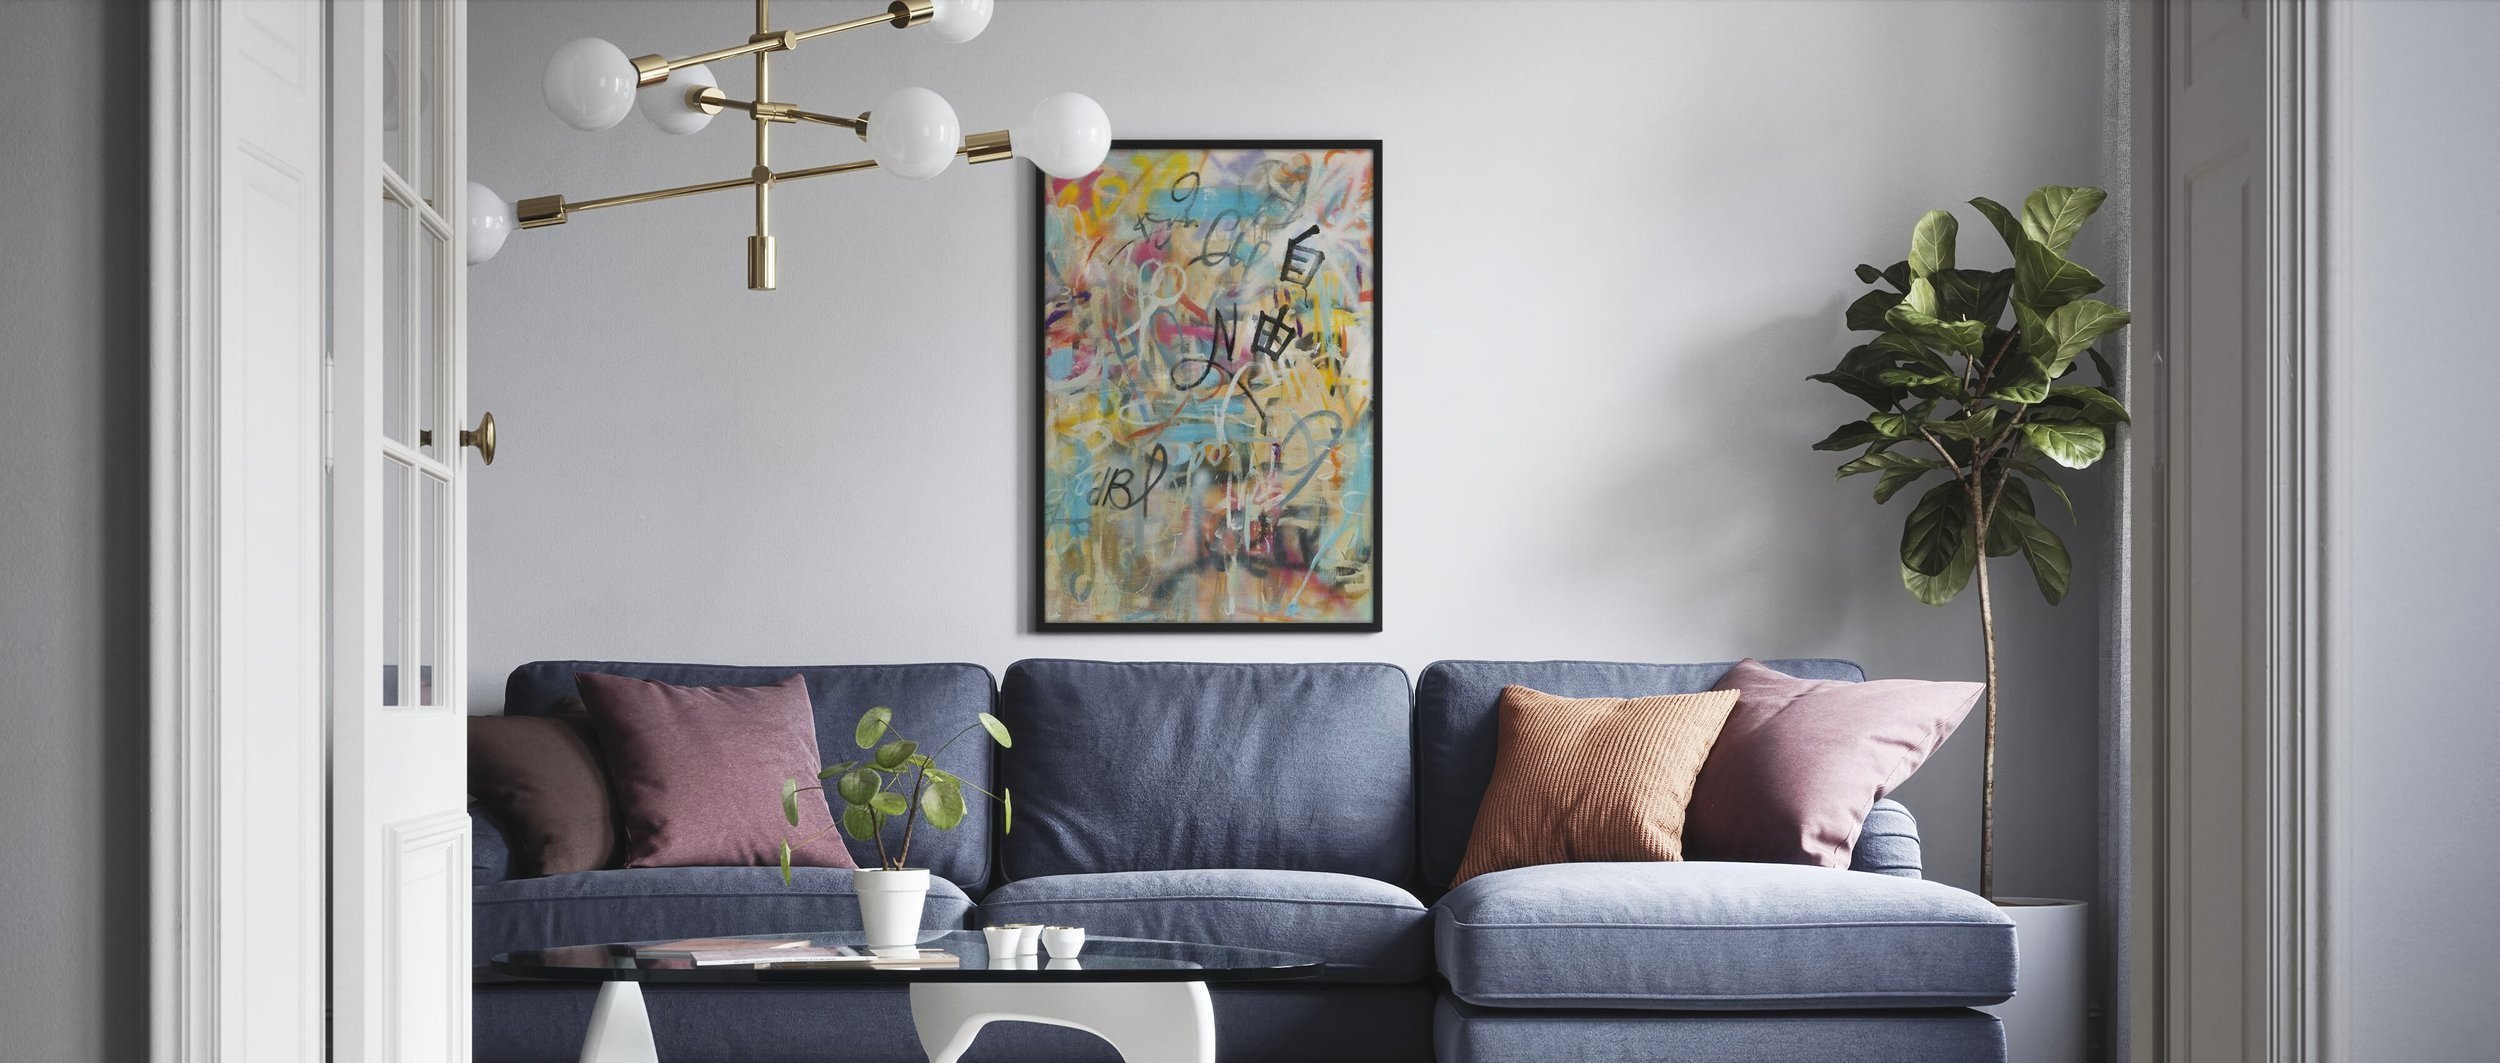
Graffit Freedom Poster - PhotoWall
Although my initial dream was to have Robert create a grafitti piece for the living room that just wasn’t going to happen anytime soon so I chose to get one from Photowall instead. It allows us to showcase where we come from, NYC and I’m pairing it with a gold bamboo frame to embody gold bamboo earrings, an ode to LL Cool J’s track, Around The Way Girl and our love of Hip Hop music.

Photowall Wallpaper Nami - Superlight
I was thinking about buying new curtain rods - ones that hang from the ceiling since I prefer to not mount them on the wallpaper. I plan on hanging the ends of the rods further from the window than where they are now, help keep the focus off the eyesore of the sectional. This wall has given me problems in the past when hanging a curtain rod so to avoid drilling in multiple areas and a headache, I was thinking of mounting the curtain rod on the ceiling instead. Another option or plan B might be to just buy a regular curtain rod and just make the template holes on the wall before hanging the wallpaper to make sure there are no installation issues. It’s nice to have options!
Remember how I said before that when it comes to decorating, you wish for the best, but plan for the worst? This is an example of that and it’s one of the reasons I wanted to share the behind the scenes process with you guys because as you embark on your own decorating journey, you too will be thrown some life curve balls that will affect the timeline of your decorating project some you have control over and others you do not.
As excited as I am to get this room completed, I’m also mindful of my energy levels and making a conscious decision to complete the steps of this project while I’m in feel good energy state and not coming from a place of exhaustion and needing/wanting anxiously to cross things off my long ass To Do list. In other words, this ain’t no HGTV show where you see a living room makeover come together in a 30 minute episode. This is real life and in real life, decorating takes time and life just lifes so there’s that.
Click here to see the next phase of the living room makeover. The changes ain’t stopping.
Disclaimer: The post was made in collaboration with Photowall.
This blog post contains affiliate links. If you click on a link and make a purchase, I will earn a commission (at no additional cost to you). I only recommend products and services that I have found to be helpful and trustworthy. For more information, see my terms + conditions page here. Thanks so much for your support.

Want to finally transform your space to match your vibe?